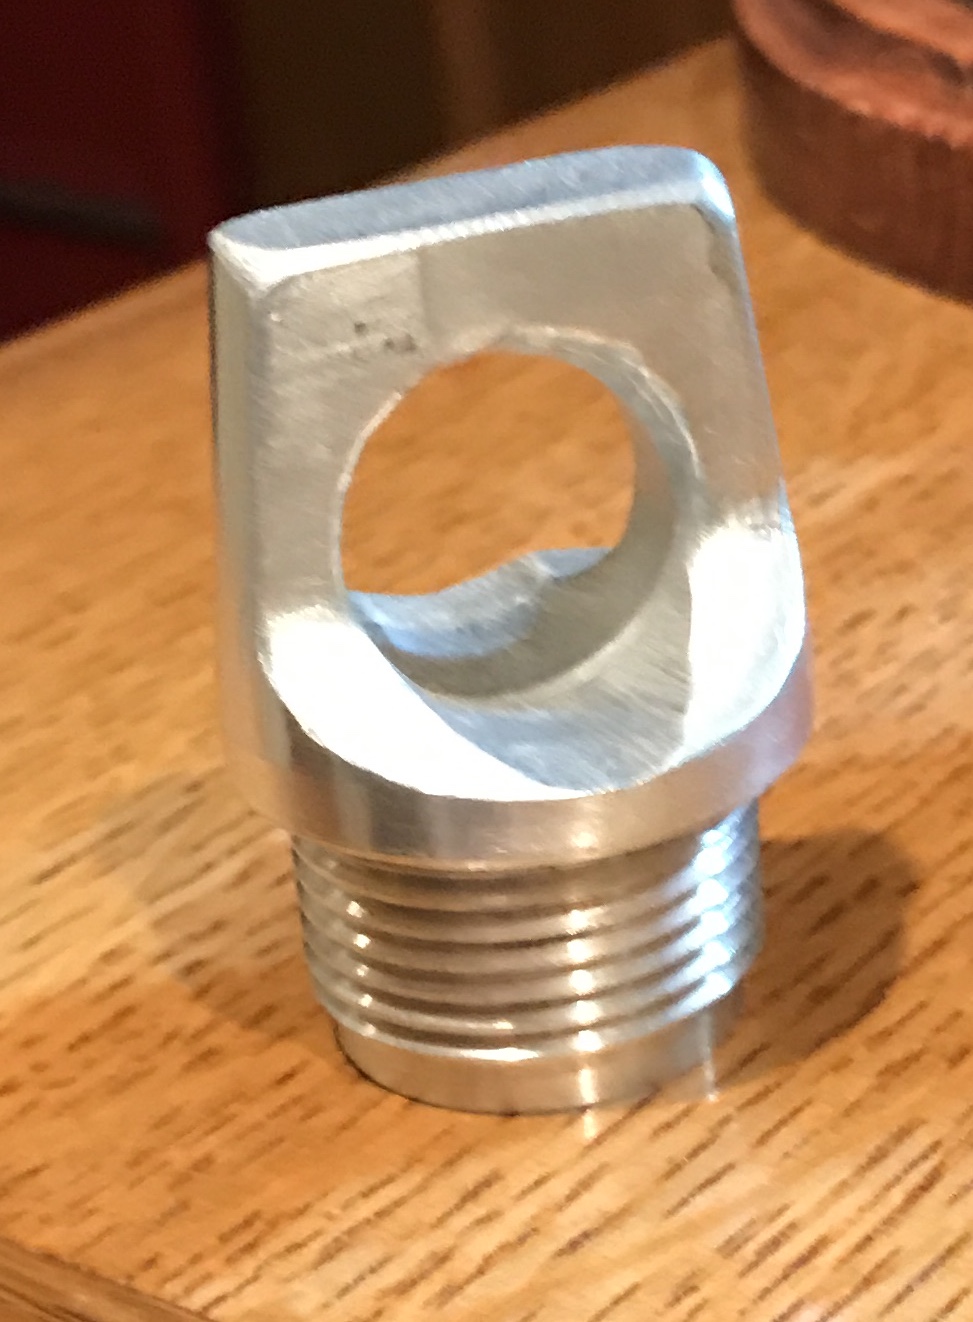
Daniel requested I make a bottle cap for his water bottle. He has a nice aluminum bottle, but the cap is plastic and wore out long before the bottle. The cap is an interesting design that will require a lot of hand work to complete. (At some point Rhea also requested one for her bottle and an additional cap was made.) The plan and the completed prototype cap are the only things I have available for this write up seven years later.
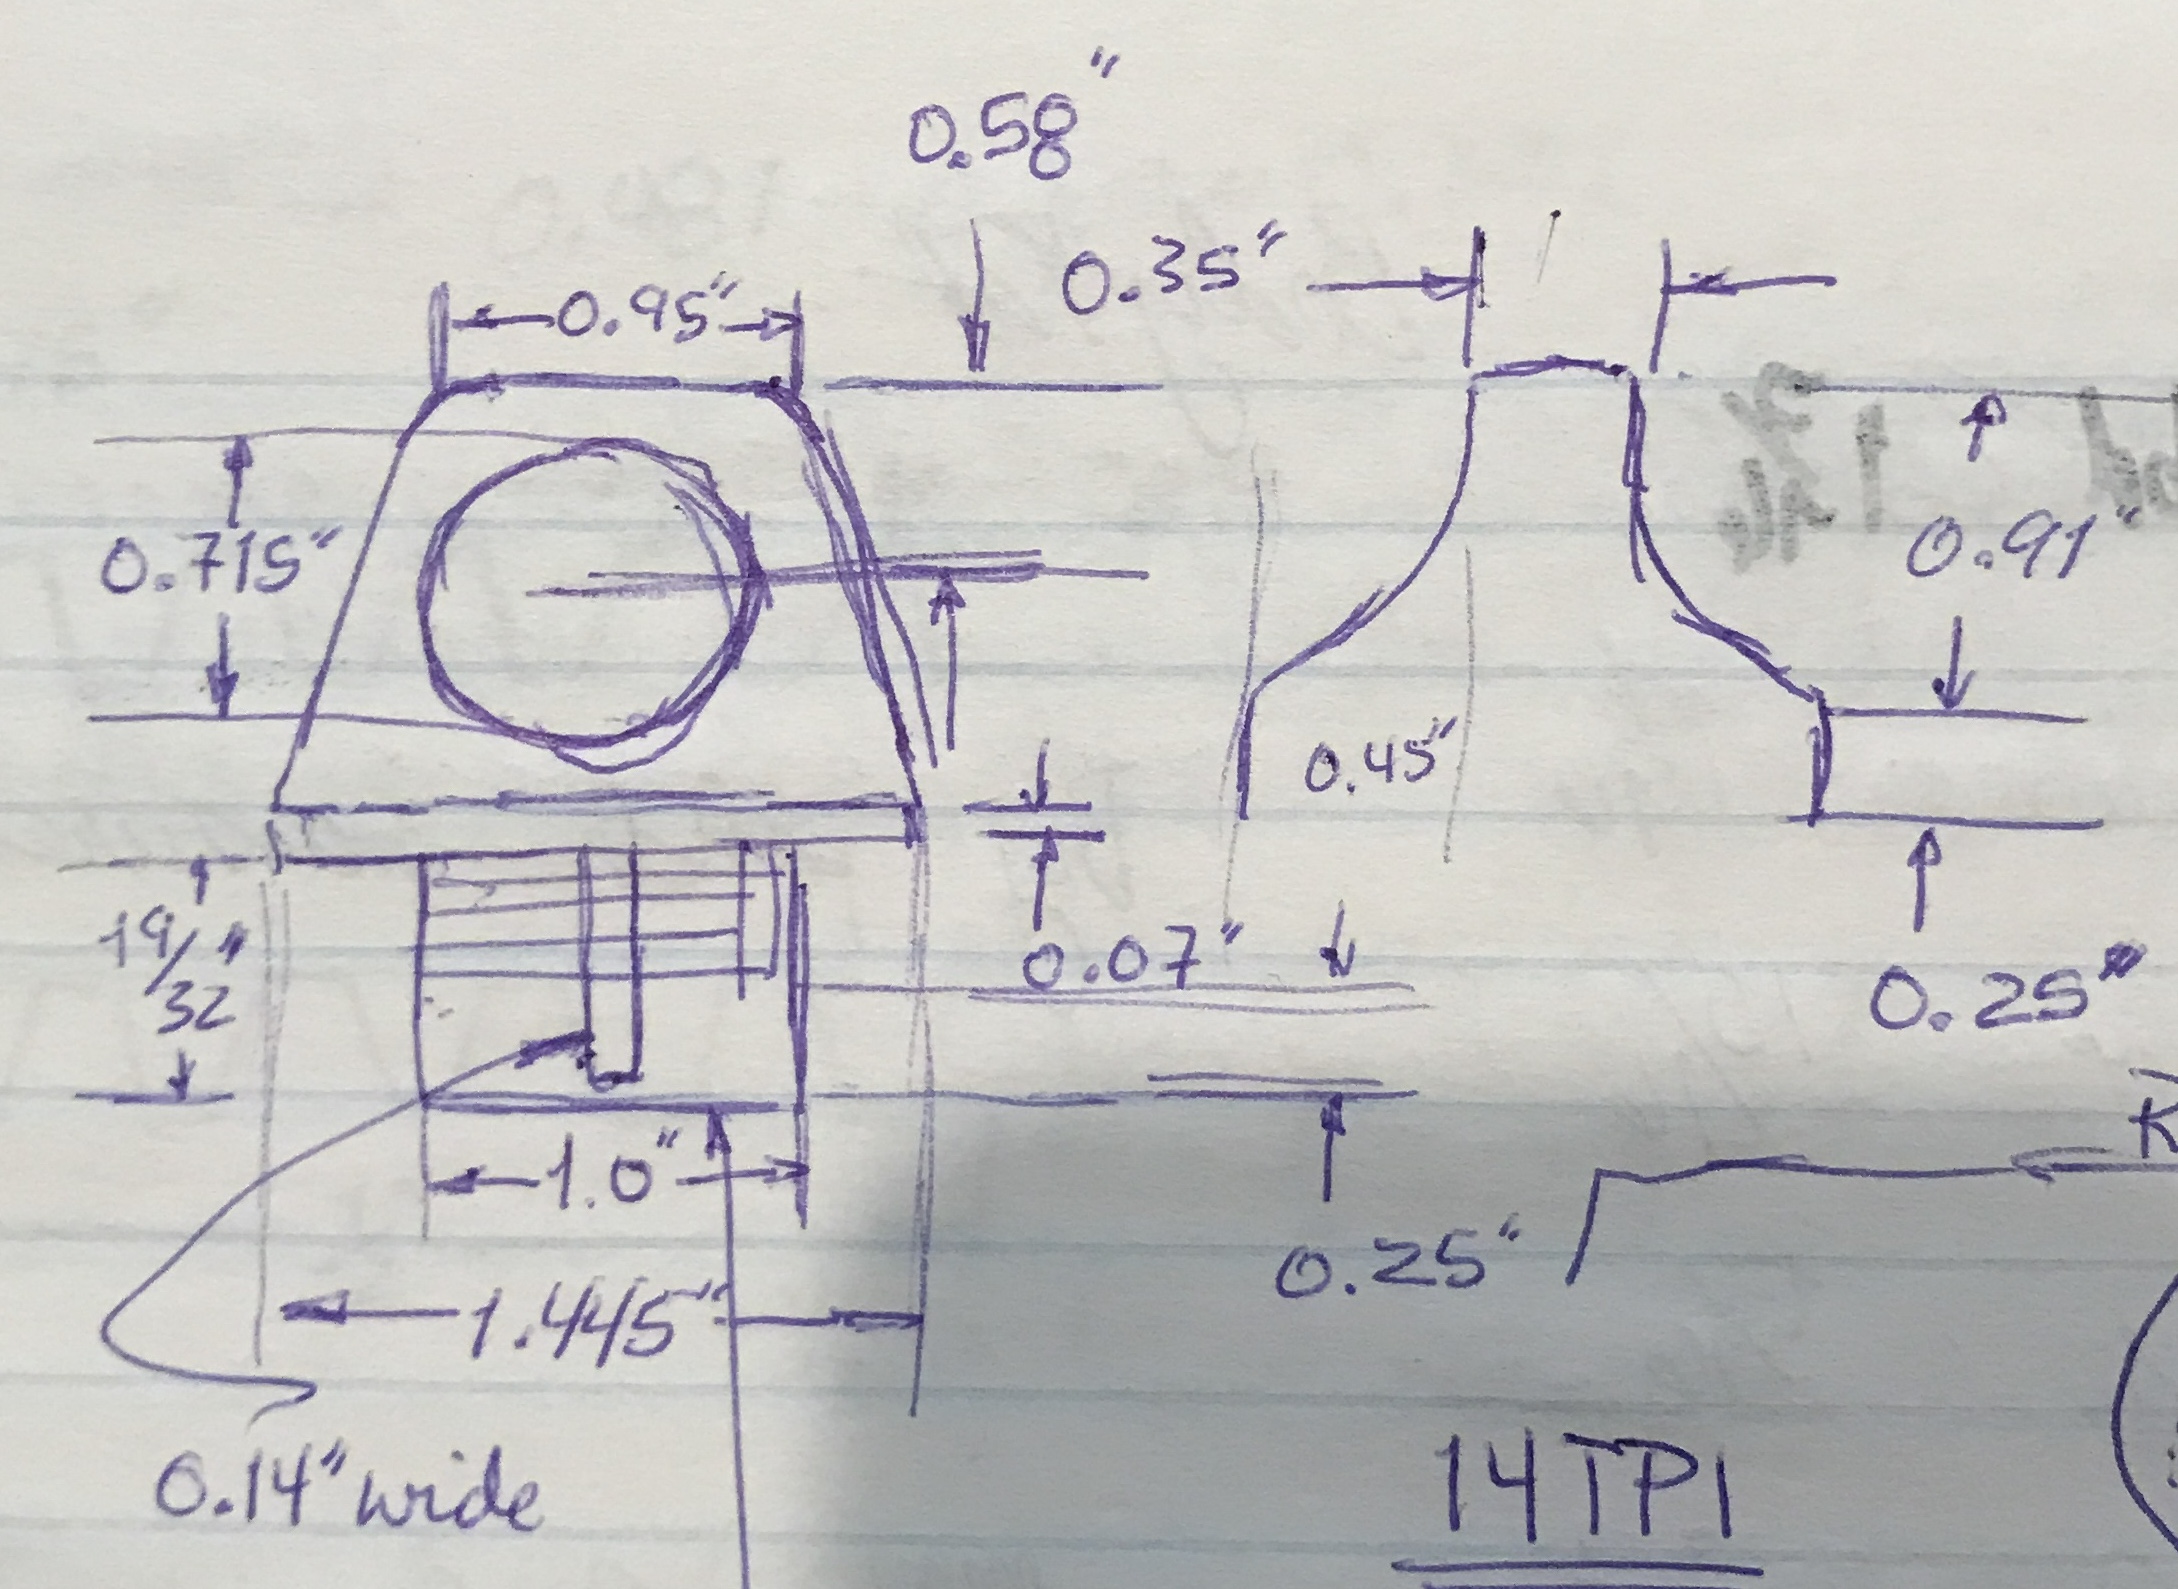
A 2.25" length of 1.25" aluminum was cut off with a hacksaw. One end was faced and the part flipped in the three jaw chuck. This end was faced and 1.09" was reduced to 1.0". The part was single point threaded 1-14. The threads were stopped about 1/16" from the shoulder to leave room for the rubber gasket.
This reduced length was held horizontally in the mill vise. The spindle was centered over the aluminum shaft. It was drilled up to 23/32" for the finger hole. The part was rotated 90° on its axis. A 3/8" end mill was used to mill in from the end on both sides. The eventual shape was milled in 0.91" from the end and 0.45" from the side.
The part was moved to the three jaw chuck and a 7° taper was cut on the drilled and milled end. The threaded end was cut off 0.66" from the shoulder. Back in the milling vise three grooves were milled through the threads with a 1/8" end mill to a depth of 1/16". These threads let the air out when the cap is screwed in place.
A lot of care was taken to round off all of the corners especially in the finger hole. The final product was sanded up to 220 grit. A gasket was made from a sheet of 1/16" thick rubber. The dimensions were ID = 1" & OD = 1.25".
The only picture I have is of the first one, that did not turn out that well. It is shown below.